Maximizing Safety: Brake Pad Replacement Guide
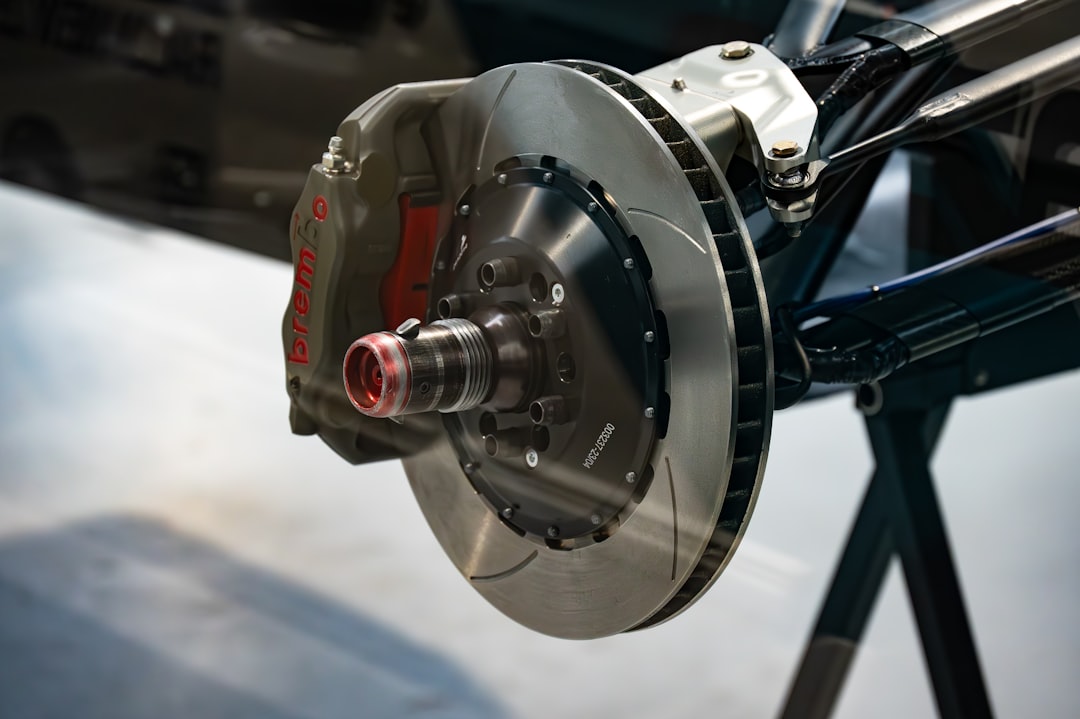
Maintaining brake pads is crucial for the overall safety and performance of a vehicle. Brake pads are a vital component of the braking system, responsible for creating the friction necessary to slow down or stop the vehicle. Over time, these pads wear down due to constant use, which can lead to decreased braking efficiency and increased stopping distances.
Neglecting brake pad maintenance can result in more severe issues, such as damage to the rotors or even complete brake failure, which poses a significant risk to both the driver and other road users. Regular inspection and timely replacement of brake pads not only enhance safety but also contribute to the longevity of the entire braking system. When brake pads are worn out, they can cause uneven wear on the rotors, leading to costly repairs.
Furthermore, maintaining brake pads can improve fuel efficiency; a vehicle with a well-functioning braking system requires less energy to operate. Therefore, understanding the importance of brake pad maintenance is essential for any vehicle owner who prioritizes safety and cost-effectiveness.
Key Takeaways
- Regular brake pad maintenance is crucial for safe and efficient vehicle operation
- Signs of worn brake pads include squeaking or grinding noises, reduced braking power, and a vibrating brake pedal
- Choosing the right brake pads involves considering factors such as driving style, vehicle type, and budget
- Tools and equipment needed for brake pad replacement include a jack, lug wrench, C-clamp, and brake cleaner
- A step-by-step guide to brake pad replacement includes removing the wheel, caliper, old brake pads, and installing new pads and reassembling the caliper and wheel
Signs of Worn Brake Pads
Identifying worn brake pads early can prevent more extensive damage and ensure safe driving conditions. One of the most common indicators of worn brake pads is a high-pitched squealing noise that occurs when the brakes are applied. This sound is typically produced by a small metal tab that acts as a wear indicator, alerting drivers that it’s time for a replacement.
If this noise is ignored, it can escalate into a grinding sound, which indicates that the pads have worn down completely and are now making contact with the rotor, leading to potential rotor damage. Another sign of worn brake pads is a noticeable decrease in braking performance. If you find that your vehicle takes longer to stop or if the brake pedal feels spongy or sinks to the floor when pressed, these could be symptoms of worn pads or other issues within the braking system.
Additionally, uneven wear on the brake pads can cause the vehicle to pull to one side when braking, which not only compromises safety but also indicates that immediate attention is required. Regularly monitoring these signs can help maintain optimal braking performance and prevent further complications.
Choosing the Right Brake Pads

Selecting the appropriate brake pads for your vehicle is essential for ensuring optimal performance and safety. There are several types of brake pads available on the market, each designed for specific driving conditions and preferences. The most common types include organic, semi-metallic, and ceramic brake pads.
Organic pads are made from materials like rubber and resin, providing quiet operation and good performance in normal driving conditions. However, they may wear out faster than other types under heavy use. Semi-metallic brake pads contain metal fibers mixed with other materials, offering excellent heat dissipation and durability.
They are ideal for high-performance vehicles or those frequently subjected to heavy braking. On the other hand, ceramic brake pads are known for their longevity and low dust production, making them a popular choice for everyday drivers seeking a balance between performance and comfort. When choosing brake pads, it’s essential to consider factors such as driving style, vehicle type, and environmental conditions to ensure you select the best option for your needs.
Tools and Equipment Needed for Brake Pad Replacement
| Tools and Equipment | Description |
|---|---|
| Jack and Jack Stands | Used to lift the vehicle and secure it in place |
| Lug Wrench | For removing and tightening lug nuts |
| C-Clamp | Used to compress the caliper piston when replacing brake pads |
| Brake Cleaner | For cleaning brake components |
| Brake Grease | Used to lubricate caliper slide pins and other brake components |
| Socket Set | For removing and installing various brake components |
| Brake Pad Spreader Tool | Helps to spread the caliper and make room for new brake pads |
| Torque Wrench | For tightening lug nuts and other bolts to the manufacturer’s specifications |
Replacing brake pads requires specific tools and equipment to ensure the job is done safely and effectively. A basic toolset should include a jack and jack stands to lift the vehicle securely off the ground. A lug wrench is necessary for removing the wheel bolts, while a socket set will help in loosening caliper bolts.
Additionally, a C-clamp or brake caliper tool is essential for compressing the caliper piston back into its housing, allowing for easy installation of new pads. Other useful tools include a torque wrench to ensure that all bolts are tightened to the manufacturer’s specifications, as well as a wire brush for cleaning any rust or debris from the caliper and rotor surfaces. It’s also advisable to have some brake cleaner on hand to remove dust and grime from components before reassembly.
Safety gear such as gloves and goggles should not be overlooked, as they protect against sharp edges and debris during the replacement process.
Step-by-Step Guide to Brake Pad Replacement
Replacing brake pads can be a straightforward process if approached methodically. Begin by ensuring that the vehicle is parked on a flat surface with the parking brake engaged. Loosen the lug nuts slightly before lifting the vehicle with a jack and securing it with jack stands.
Once elevated, remove the wheel completely to access the brake assembly. Next, locate the caliper, which houses the brake pads, and remove it by unscrewing the caliper bolts. With the caliper removed, carefully slide out the old brake pads from their slots.
Before installing new pads, use a C-clamp or brake caliper tool to compress the caliper piston back into its housing; this step is crucial as it creates enough space for the new pads. After compressing the piston, insert the new brake pads into place, ensuring they fit snugly against the rotor. Reattach the caliper over the new pads and secure it with bolts, making sure they are tightened to the manufacturer’s specifications using a torque wrench.
Once everything is reassembled, it’s time to put the wheel back on and lower the vehicle back to the ground. Tighten the lug nuts in a crisscross pattern to ensure even pressure across the wheel. After completing these steps, it’s advisable to pump the brake pedal several times before driving; this action helps seat the new pads against the rotor properly.
Testing the Brakes After Replacement

After replacing brake pads, it’s essential to test them before hitting the road fully. Start by gently pressing down on the brake pedal while still stationary; this action helps ensure that everything is functioning correctly and that there is no unusual noise or resistance. If you hear any grinding or squeaking sounds during this initial test, it may indicate improper installation or that something else in the braking system requires attention.
Once satisfied with stationary testing, take your vehicle for a short drive in a safe area where you can perform further checks. Gradually increase your speed and apply brakes gently at first to assess their responsiveness. Pay attention to how quickly your vehicle comes to a stop; if you notice any pulling to one side or if there’s an unusual vibration in the steering wheel during braking, these could be signs of misalignment or other issues that need addressing.
It’s crucial not to ignore these symptoms as they could compromise your safety on the road.
Tips for Extending the Life of New Brake Pads
To maximize the lifespan of new brake pads, several practices can be adopted that promote longevity and efficiency. One effective strategy is to avoid aggressive driving habits such as rapid acceleration and hard braking. Smooth driving not only enhances fuel efficiency but also reduces wear on brake components.
Additionally, maintaining a safe following distance allows for gradual deceleration rather than sudden stops, further preserving brake pad integrity. Regular maintenance checks are also vital in extending brake pad life. This includes periodic inspections of not just the pads but also other components of the braking system such as rotors and calipers.
Keeping an eye on fluid levels in the braking system can prevent issues related to hydraulic pressure that may lead to premature wear on pads. Furthermore, consider using high-quality brake pads designed for your specific vehicle type; investing in quality components often pays off in terms of durability and performance.
When to Seek Professional Help
While many vehicle owners may feel comfortable performing their own brake pad replacements, there are instances when seeking professional assistance is advisable. If you encounter any unusual noises during testing after replacement or if you experience significant changes in braking performance despite following proper procedures, it may indicate underlying issues that require expert diagnosis. Problems such as warped rotors or malfunctioning calipers can complicate what seems like a straightforward pad replacement.
Additionally, if you lack experience with automotive repairs or do not have access to necessary tools and equipment, consulting with a professional mechanic can save time and ensure safety. Professionals have specialized knowledge and experience that can help identify potential problems before they escalate into more significant issues. Ultimately, prioritizing safety should always be at the forefront when dealing with critical components like brakes; when in doubt, it’s best to leave it to those who are trained in automotive repair.
FAQs
What are brake pads?
Brake pads are a key component of a vehicle’s braking system. They are the part of the brake system that makes contact with the brake rotor, creating friction to slow or stop the vehicle.
When should brake pads be replaced?
Brake pads should be replaced when they are worn down to a thickness of 3mm or less. It is also important to replace brake pads if they are making unusual noises, causing vibrations, or if the brake warning light is illuminated on the dashboard.
How often should brake pads be replaced?
The frequency of brake pad replacement can vary depending on driving habits, vehicle type, and other factors. As a general guideline, brake pads should be inspected at least every 12,000 miles and replaced as needed.
What are the signs that brake pads need to be replaced?
Signs that brake pads need to be replaced include squealing or grinding noises when braking, reduced braking performance, a pulsating brake pedal, or a longer stopping distance.
Can I replace brake pads myself?
While some experienced car owners may be able to replace brake pads themselves, it is generally recommended to have brake pads replaced by a professional mechanic. This ensures that the job is done correctly and safely.
How much does it cost to replace brake pads?
The cost of replacing brake pads can vary depending on the make and model of the vehicle, as well as the type of brake pads being used. On average, the cost of replacing brake pads ranges from $100 to $300 per axle.
Related Posts
Maximizing Performance: Electric Fuel Pumps

Ultimate Guide to Car Body Detailing